How to Keep Food Cold When Camping in the UK
Published 2 August 2026
A cool box does not make cold, it only stores the cold you put in. Here is how to load it, pack it and site it so food stays below 8°C for two to three days on a British pitch with no hook-up.
We earn commission from qualifying Amazon purchases. It costs you nothing and does not affect what we recommend.
Quick Answer
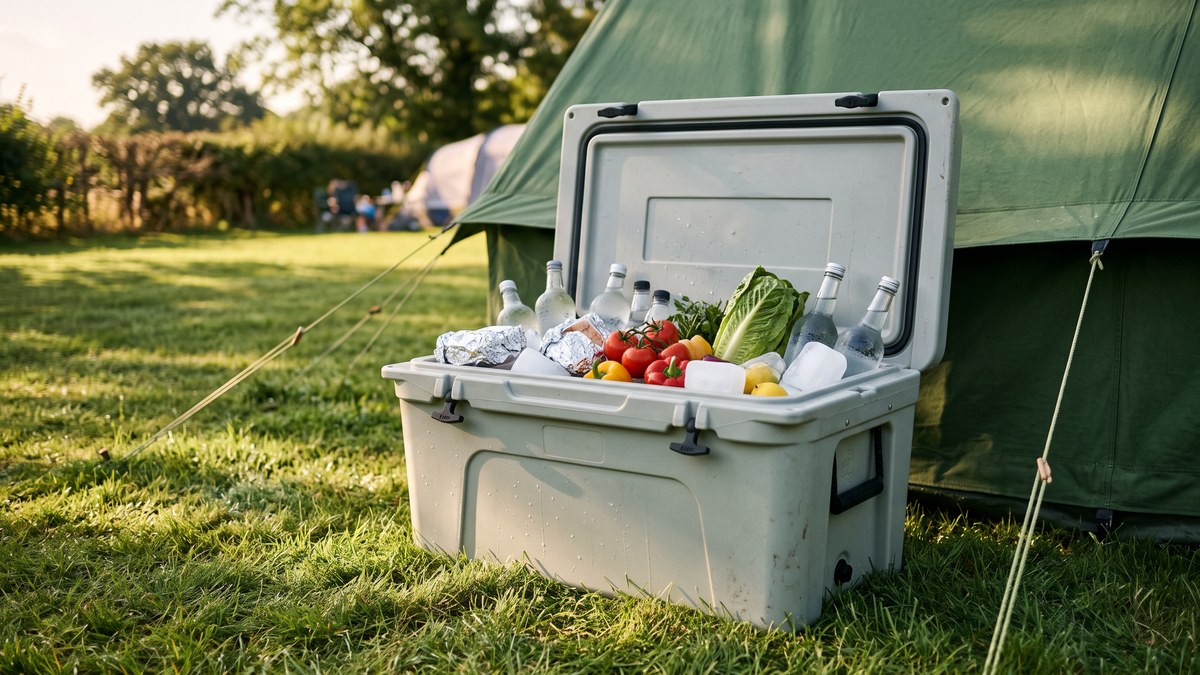
Use a well insulated cool box, chill both the box and its contents the day before, then fill it with roughly twice as much frozen ice as food by volume. Keep it in permanent shade, lift it off the warm ground, and open it as rarely as you can manage. Done properly that holds food below 8°C for two to three days on a British summer pitch with no electric hook-up.
Keeping food cold is the part of camping that quietly decides whether a trip is relaxing or a running battle with a bag of warm mince. It is also the part most people get wrong in the first hour, usually by putting room temperature shopping straight into a room temperature cool box and trusting the ice to sort it out.
The fix starts with one idea: a cool box is not a fridge. A fridge makes cold. A cool box only stores the cold you put into it, and then slowly loses it. Everything below follows from that. Load in as much cold as you physically can before you leave home, then spend the rest of the trip stopping it leaking away.
This guide covers what to buy, how much ice you really need, the packing order that keeps raw meat away from your salad, what to do on a non-electric pitch, and the point at which food genuinely has to go in the bin. It is written for British conditions, where the problem is rarely blazing heat and far more often a muggy 22°C afternoon, a pitch with no shade, and four days between shops.
Start With the Right Cool Box or Cool Bag
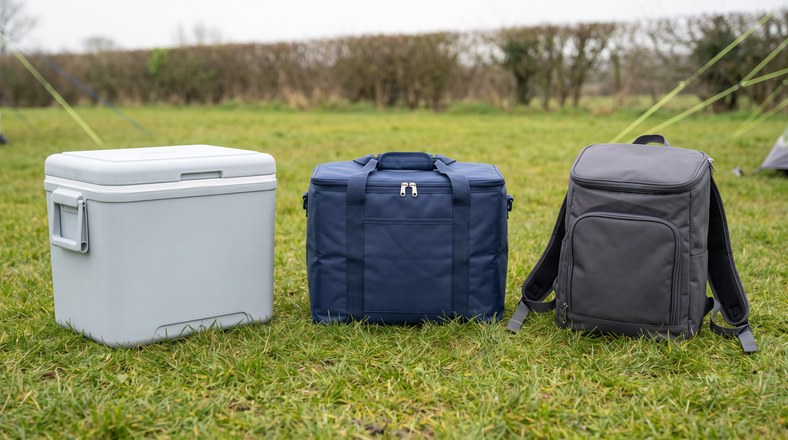
Insulation is the whole game, and it comes down to three things: how thick the walls are, how well the lid seals, and how full you can pack the inside. Everything else is convenience.
Hard cool boxes
A rigid box with thick walls is the only sensible choice for anything longer than one night. Packed properly and kept shut, a decent hard box will hold food safely for two to three days in a British summer. The weak point is almost always the lid rather than the body. A lid that sits loose or flexes in the middle bleeds cold air every time it is knocked, and it is the first thing to fail on cheaper boxes, so check how firmly it seats before you trust a week of food to it.
Soft cool bags
Soft bags win on weight, on packing down flat when empty and on being easy to carry across a field. They lose on hold time. Expect somewhere around 12 to 24 hours from a well filled soft bag rather than days, which makes them ideal as the drinks bag, the shopping run bag or the day trip bag, but not the main food store for a week away.
Cooler rucksacks
A cooler rucksack solves the awkward walk from a car park to a tent pitch, and it suits beach and hill days where you want both hands free. Capacity is modest, but a well insulated one with a hard liner will still have ice rattling in it after a couple of days if you keep it shaded and shut.
Electric cool boxes
Thermoelectric boxes only work while they are plugged in, and most chill to a fixed number of degrees below the surrounding air rather than down to a set temperature. On a 25°C afternoon in an awning that may not be cold enough on its own. They earn their place on a hook-up pitch, but treat them as a top-up rather than a fridge, because the moment the power goes off they are simply a thin walled box.
Getting the size right
Buy for the trip you actually take. A half empty cool box warms up far faster than a full one, because air holds almost no cold. Be careful with listings that sell several capacities under one product name too, since the photographs usually show the largest. Two smaller containers normally beat one big one anyway, for reasons covered further down.
Pre-Chill Everything the Day Before
A warm cool box is a heat source. Put 20°C plastic and 20°C shopping into it and the first batch of ice spends most of its life cooling the box and the food rather than keeping anything cold. That is where the first day usually disappears.
The day before you travel:
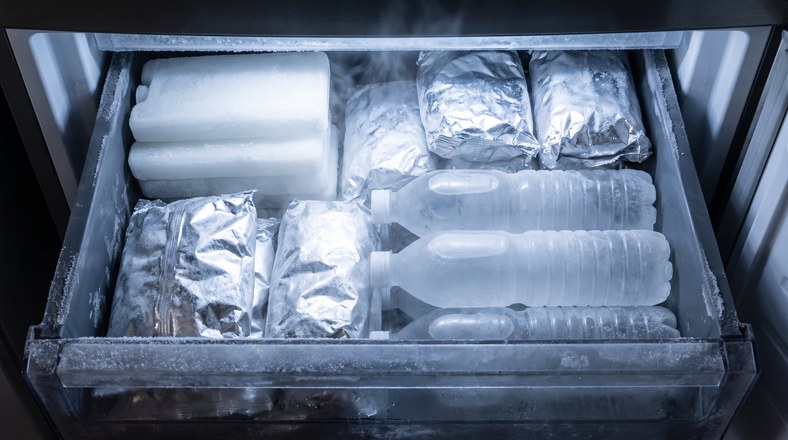
- Freeze the ice packs solid. Most gel packs need a full 24 hours in a domestic freezer to freeze all the way through. A pack that is still soft in the middle is doing roughly half the job it should.
- Chill the box itself. Leave a couple of spare ice packs or a bag of ice in the empty cool box overnight, or stand the box outside on a cool night. Tip out any meltwater in the morning before you load it.
- Get the food properly cold first. Everything should come out of a fridge or a freezer, never off a worktop. Drinks are usually the warmest thing anyone packs, so get them into the fridge a day ahead.
- Freeze whatever will freeze. Mince, sausages, chicken, milk, bread, cooked chilli and bolognese all freeze well and then work as extra ice for the first day or two before you eat them. Plan those meals for days two and three so they have time to thaw.
- Freeze drinking water. Plain water bottles frozen lying flat give you cooling on the way out and cold drinking water on the way back.
Pack the box as late as you can and load it into the car last. In the boot footwell it stays in shadow; on a rear parcel shelf it will cook in the sun the whole way there.
Pick the Right Ice and Use Enough of It
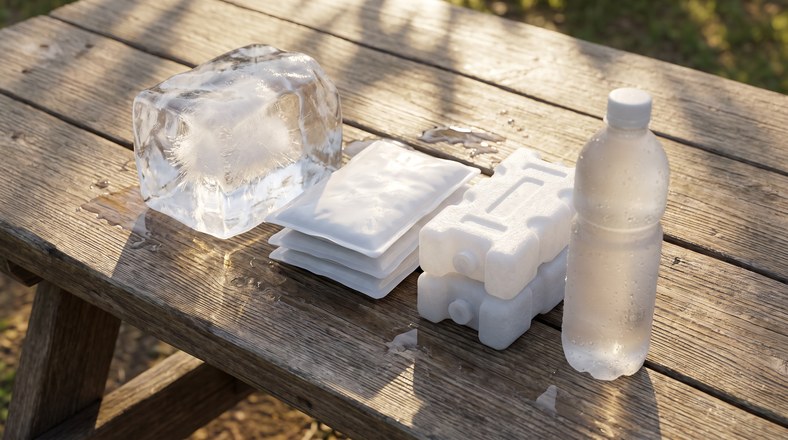
Two rules cover almost everything here: bigger lumps last longer, and you need more ice than you think.
Aim for twice as much frozen mass as food
By volume, two parts ice to one part contents is the target for a multi-day trip. It sounds excessive until you accept that the ice is the only thing doing any work in the box. If the food will not fit at that ratio, either the box is too small or you are carrying too much fresh food for the trip.
Big blocks beat loose cubes
A large solid block has far less surface area for its mass than the same weight of cubes, so it melts much more slowly. Loose ice cubes vanish first and leave you with a box of water by the second afternoon. Use cubes only to fill the small gaps around everything else.
Chunky blocks for the base, slim packs for the layers
The two shapes do different jobs and most people are better off owning both. Thick moulded blocks hold their cold longest and belong on the floor of the box and against the sides. Slim flat packs slide between layers of food and down the edges, which is exactly where warm air otherwise pools. Slim packs on their own tend to disappoint in a big cool box because there is not enough frozen mass in them; chunky blocks on their own leave gaps.
Frozen bottles versus gel packs
Plain water is a genuinely excellent coolant. It takes a lot of energy to melt water ice, so gram for gram a frozen bottle of water stores more cooling than most gel packs do. What gel packs buy you is shape, reusability and no puddle when they thaw. The sensible answer is both: gel packs as the structure, a couple of frozen bottles filling the dead space.
Carry spares
Plenty of UK campsites will refreeze ice packs at reception or in the site shop, sometimes free and sometimes for a small charge, usually returned the following day. That only helps if you have a second set to swap in while the first set is freezing, so pack more packs than you think you need.
Pack in Layers, Coldest at the Bottom
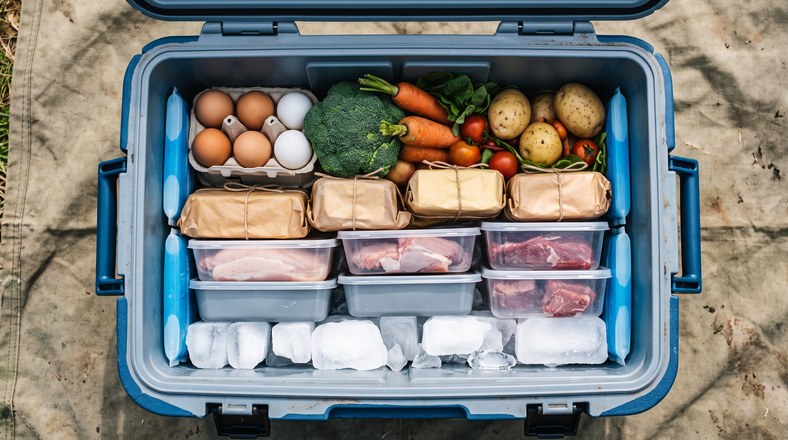
Cold air sinks, so ice at the top does useful work as well as ice at the bottom. In practice you want both, and you want the layout to handle food safety too, because a cool box is the one place on a campsite where raw chicken and ready-to-eat salad share a container.
Working from the bottom up:
- A base layer of thick ice blocks covering the whole floor.
- Raw meat and fish, decanted into leak-proof boxes rather than left in shop packaging, so nothing can drip onto anything below. It goes lowest to stop drips, not because it needs to be the coldest.
- Dairy, cooked food and leftovers in sealed containers.
- Salad, fruit and eggs at the top, where they will not be crushed or frozen solid against a block.
- Slim ice packs slotted down the sides and one laid flat across the top of everything.
Then fill every gap. Air is the enemy, so pack tight and close up any remaining space with a tea towel or a folded jumper. Keep anything that does not need chilling out of the box altogether: bread, tomatoes, onions, potatoes, hard fruit and unopened UHT milk are all perfectly happy in a plastic crate inside the tent, and every item you leave out is more room for cold.
Run two containers, not one
The single biggest improvement most campers can make is splitting drinks and snacks into a separate bag. The drinks container gets opened twenty times a day. The food box might get opened three times. Keep them apart and the food box holds its cold for days instead of hours, which is worth more than any upgrade you could buy.
Keep the Lid Shut and the Box in the Shade
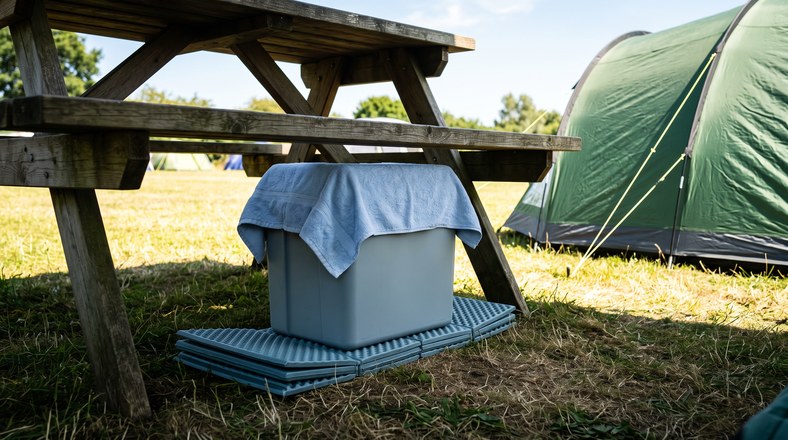
Once you are on the pitch your only job is to slow the leak. Three things dominate: sunlight, the ground, and how often the lid comes up.
Shade, and keep moving it
Direct sun on a closed cool box will beat any amount of insulation. Put it in the shadow of the tent, under the awning or beneath a table, then move it as the shadow moves through the day. A spot that is shaded at 10am is often in full sun by 3pm, which is precisely when it matters most.
Lift it off the ground
Grass that has had sun on it all afternoon is warm, and that heat conducts straight into the base of the box. A folded foam mat, a spare groundsheet, a doormat or even a flattened cardboard box underneath makes a real difference for no weight and no money.
Open it as little as possible
Every opening tips out the cold air and replaces it with warm. Decide what you need before you lift the lid, take it all out in one go, and shut it straight away. A box or bag with a small hatch or top flap is genuinely useful here, because you can pull out a drink or the milk without breaking the seal on the main lid.
The damp towel trick, with a caveat
Draping a wet towel over a cool box does cool it by evaporation, and it is worth doing, but it works best in dry moving air. On a humid, still British afternoon the effect is modest. Shade and insulation from the ground are worth far more, so do those first and treat the towel as a bonus rather than a strategy.
Never leave it in the car
A parked car in summer sun turns into an oven within an hour and will undo a whole day of careful packing. If you are out for the day the cool box comes with you or stays shaded at the pitch, never on a back seat.
Check the Temperature and Know What to Bin
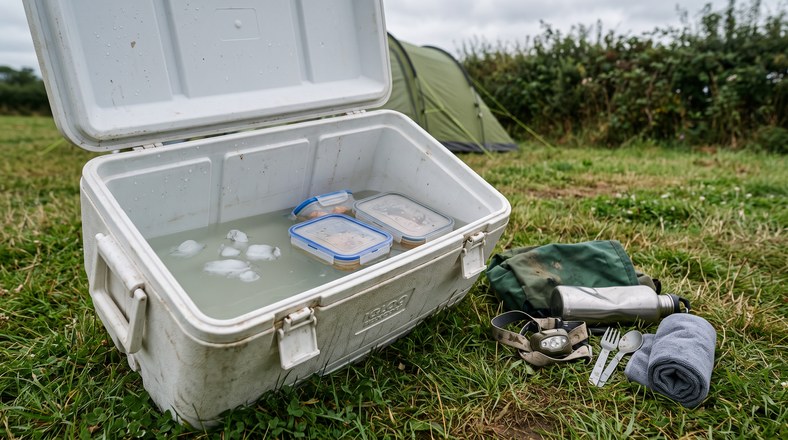
Guessing is where people get ill. Chilled food needs to stay at 8°C or below, which is the legal ceiling for chilled food in the UK, and the Food Standards Agency advises 0°C to 5°C for a fridge. A cool box that feels cold to the hand can easily be sitting at 12°C.
Use a cheap thermometer
A small fridge thermometer left in the box costs very little and settles the argument. Check it morning and evening. If it is drifting above 8°C, add ice, move the box into deeper shade, or eat the most perishable things next rather than saving them.
Plan the eating order
Jot the rough order down when you pack. Fresh fish and mince on day one, chicken and cooked leftovers on day two, hard cheese, cured meat and eggs later in the week. Anything you froze at home goes last. If you are eating out one evening, make it the final night so the box is nearly empty by then.
Meltwater: keep it, then dump it
While there is still ice floating in it, meltwater sits close to 0°C and is doing useful work, because water carries cold into your food far better than air does. Leave it alone. Once the ice has gone, that water warms quickly and does nothing but soak everything, so tip it out and add fresh ice. Drain it immediately at any point if a raw meat container has leaked into it.
When it has to go in the bin
Treat chilled food that has sat above 8°C for more than four hours as no longer safe, and do not rely on smell for raw meat, fish, cooked rice or anything containing egg or dairy. Hard cheese, unopened cured meat, butter and whole fruit and vegetables are much more forgiving. If a pack of raw chicken has been swimming in tepid meltwater since lunchtime, it goes in the bin, not on the barbecue.
Managing a non-electric pitch
None of this changes without hook-up, it just gets stricter. Run two containers, top up the ice from the site shop or the reception freezer every day or two, keep the main food box shut, and lean on food that needs no chilling at all for the back end of the trip. Plenty of people run a full week on a non-electric pitch this way without ever wondering whether the milk is still good.
Frequently Asked Questions
How long will a cool box stay cold without electricity?
A well insulated hard cool box that has been pre-chilled, filled to roughly two parts ice to one part food and kept shaded and shut will typically hold food below 8°C for two to three days in a British summer. A soft cool bag is closer to 12 to 24 hours. Both figures collapse if the box is half empty, left in the sun, or opened every twenty minutes.
Should I drain the water out of my cool box?
Not while there is still ice floating in it. Meltwater sitting at around 0°C keeps food colder than air does, so leaving it in genuinely helps. Tip it out once the ice has melted away and replace it with fresh ice, or drain it straight away if a container of raw meat has leaked into it.
Can I use frozen water bottles instead of ice packs?
Yes, and they work better than most people expect. Water stores a lot of cooling energy as it melts, so a frozen bottle often outlasts a gel pack of similar weight, and you get cold drinking water as it thaws. Leave a few centimetres of air at the top so the bottle does not split, and freeze it lying flat so it stacks neatly.
Do UK campsites let you refreeze ice packs?
Many of them do. Freezing facilities at reception or in the site shop are common on club sites and larger commercial parks, sometimes free and sometimes for a small charge, usually returned the next day. Ring ahead if it matters to your plans, and always carry a spare set so there is still cold in the box while the first set is refreezing.
How do you keep food cold on a non-electric pitch for a week?
Run two containers so the food box stays shut, freeze several of your meals at home so they act as ice for the first two days, and swap in freshly frozen ice packs from the site freezer every day or two. Plan the back half of the week around food that needs no chilling at all, such as pasta, tinned goods, hard cheese, cured meat and UHT milk.
Related Reading
- Tanness 24L Cool Box review: the lid is where it wins or loses
- Straame 30L Cooler Bag review: the 12 hour beer test
- Lifewit Cooler Backpack review: ice still rattling after two days
- Kollea 30L Cool Bag review: the top flap hatch reviewers keep talking about
- KEPLIN freezer ice blocks review: the chunky blocks for the base of the box
- 1ABOVE freezer blocks review: the slim packs that slot between the layers
- What to Pack for Festival Camping: the UK checklist that survives a muddy weekend
Disclaimer: This article contains Amazon affiliate links. We may earn a small commission from qualifying purchases at no extra cost to you.